step 2 - AUTONOMOUS control !DELAYED DUE TO COVID-19!
Purchase the drive components
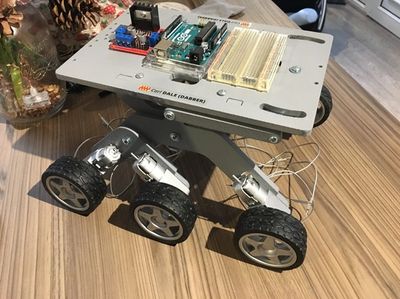
Explanation: Autonomous robots can navigate around obstacles by themselves, using their on-board sensors. First the components to drive and control the motors properly must be purchased. This will consist of a microcontroller and a motor controller, plus a simple breadboard (the block to connect the wires), and also electrical wires! If you have never done this before, do not panic; this is easier than you think! Plus, I'm here to guide you through it!
Components list for step 2
Arduino Uno (approx £16), one can found here: https://tinyurl.com/vpm4uxu
A motor controller, this project uses a L298N (£6) which can be found here: https://tinyurl.com/t2dy7rv
A bread board, six (£6) can be purchased here: https://tinyurl.com/wrj829d
Electrical wires: known as jumper cables or DuPont wires, can be purchased (£6) here: https://tinyurl.com/sunaytl
The ultrasonic sensor for autonomous operation. The ultrasonic sensor will allow your rover to know when it's getting near an obstacle: you can programme it to tell it how to react! You'll only need one but they are sold in packs (£6), such as here: https://tinyurl.com/vez9n78
If you would like to add a laser to your rover, speak to an adult about it if you are a younger maker first; they can be found here (£8): https://tinyurl.com/tmy7zv2
For this project a 12 Volt drill battery is used to power the rover. This one is cheap, and due to its design it allows charging without having to use a charging station onboard your rover (reducing weight) - the charging cable simply clicks into the battery through a hole in your bogie. This will be explained later. It can be found here: https://tinyurl.com/unqtrqd.
A 12 Volt to 5 Volt converter- to power the Arduino from the drill battery. Can be found here: https://tinyurl.com/u7jwyj2
A switch to turn your rover on/off. They are sold in packs and can be found here: https://tinyurl.com/rj8h6o9
The electronics ! DELAYED DUE TO COVID-19!


